
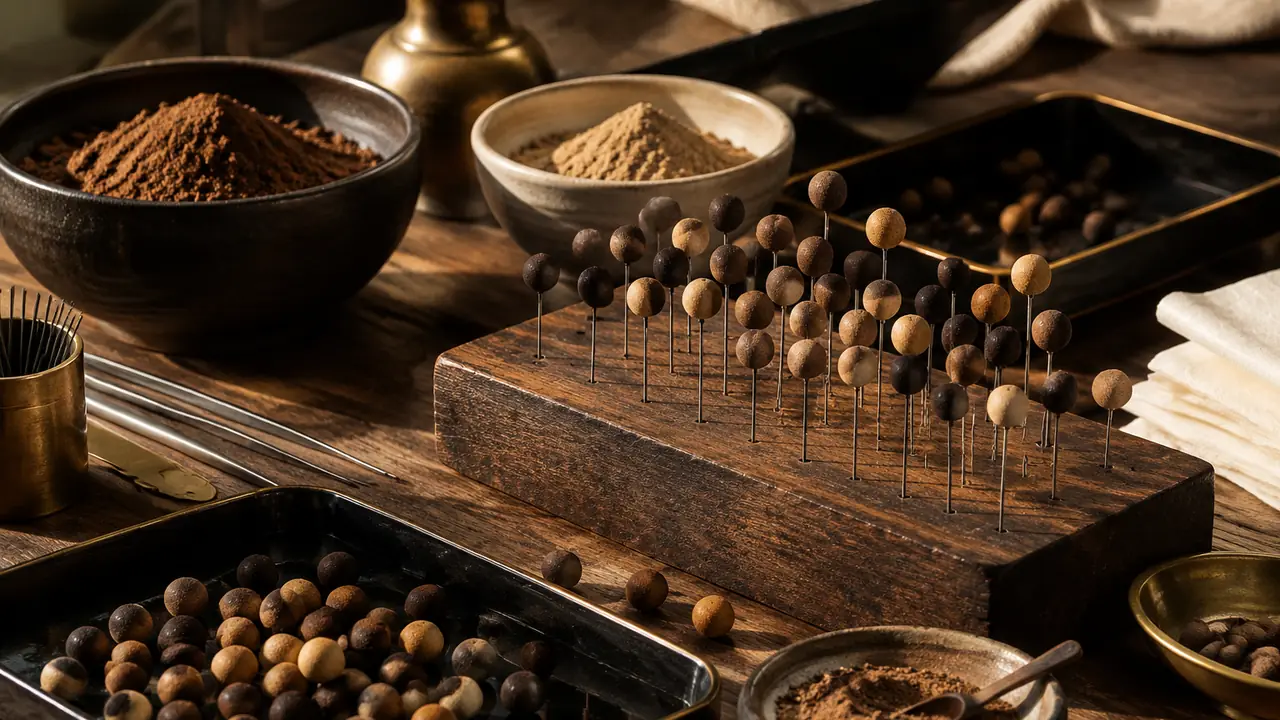
The sequence at a glance
Partner workshops in the Fujian and Guangdong incense clusters follow a broadly shared sequence. Details differ by formula and by workshop, but the seven stages below are the common practice, and a sourcing desk uses them as the checklist for sample rounds and audits.
| Step | What happens | Typical time or condition |
|---|---|---|
| 1. Material preparation | Wood, resin and botanicals are sorted, cleaned and prepared | Per formula |
| 2. Drying and milling | Shade-dried material is ground and sieved | Fine, even powder |
| 3. Dough mixing | Powder, nanmu binder and a liquid are kneaded together | Nanmu about 25% of the powder |
| 4. Resting | Dough is sealed and left to settle | About 24 hours |
| 5. Rolling and piercing | Dough is cut by weight, rolled round, pierced with a steel pin | Manual |
| 6. Shade drying | Beads dry slowly on racks and are turned | 5-10 days, about 25 C and 60% RH |
| 7. Polishing and aging | Surface is polished, beads are sealed in jars to mature | Per program |
Steps one and two: preparation and powder
Everything starts with the raw material. Sandalwood heartwood, agarwood chips and any botanical accents such as flowers, spices or dried fruit are sorted and cleaned, then dried in the shade rather than in an oven so the volatile notes stay in the wood. The dry material is milled and passed through a sieve. Milling is the one stage where machines are routinely used, and fineness matters: coarse particles show as pits on a bead and make the surface rough under the polisher. The detail is in milling and sieving incense powder.
Step three: the dough
The aromatic powder is combined with a natural binder. The common choice is nanmu bark powder, usually about a quarter of the total powder weight in standard practice, which becomes sticky with water and dries hard. A liquid carries it: warm water, a herbal decoction, pear juice for a goose pear formula, or a little honey, which acts as a plasticizer and keeps the dough supple. The kneader works the mass until it feels like firm clay. There is no industrial glue and no synthetic fragrance oil in the standard specification, confirmed in writing for each program. Binder choice is covered in the nanmu binder guide.
Step four: letting the dough rest
The kneaded dough is sealed and left for about 24 hours. Workshops sometimes call this fermenting or pounding the dough; in practice it lets moisture spread evenly through the mass and the binder hydrate fully. Dough that goes straight to rolling tends to be wet at the center and dry at the edge, and beads made from it crack as they dry. This quiet day is one of the simplest quality controls in the process, and one reason a sample cannot be finished in an afternoon. See why 24 hours matter.
Steps five and six: rolling, piercing and drying
The rested dough is cut into pieces by weight, rolled between the palms into spheres and pierced with a steel pin. A typical 8 mm bead falls in the range of about 0.3 to 0.5 g, so a worker cutting by weight keeps the strand even. The hole is typically 1.2 to 2.0 mm and should run through the center. Hand rolling is where skill shows, and it is also why full automation is rare; the reasons are laid out in why incense beads resist machine production.
Wet beads then go to racks in a shaded, ventilated room. Workshops often aim for about 25 C and 60% relative humidity, turning the beads so every side dries evenly, over roughly 5 to 10 days. Sun and direct heat are avoided because the skin dries first and splits. A buyer who sees beads drying on a sunny windowsill has learned something about that workshop. Read more in shade drying incense beads.
Step seven: polishing and aging
Dry beads are polished, by hand or in a tumbling drum with a soft medium, until the surface turns smooth and slightly satin. They are then sealed in jars or bags and left to age so the different powders settle into one scent. This stage is where a bead that smelled sharp in the first week becomes rounder. It also doubles as a stability check, since beads that develop cracks or spots during aging are removed before packing. The follow-on step is described in polishing and aging incense beads.
Why the order of the steps matters
Each stage prepares the next, and skipping one shows up later as a defect that is hard to trace. Coarse powder becomes a pitted surface after polishing. A dough that has not rested becomes a bead with a wet core that cracks on day four of drying. Beads dried too quickly look fine on the rack and split in the jar weeks later. Beads sealed before they are fully dry grow spots in transit. For this reason a sourcing desk asks a workshop to describe the sequence for the specific formula rather than in general terms, and compares the answer with what is visible on the floor.
It also explains why a sample made in a week and a bulk lot made in a month can differ. A sample is often made from a small batch of dough with extra attention at every step. A bulk lot has more dough, more hands and more racks, so the controls on weight, drying room conditions and sorting have to carry the quality that individual attention carried before. The sample round is therefore a test of the workshop's method as much as of the scent, and the retained sample is the reference every later lot is compared against.
Where a buyer can check quality
- Before rolling: the formula sheet and the binder share, written down and matched to the sample.
- During drying: temperature and humidity of the drying room, and whether beads are turned.
- After drying: weight stability across a few days, a sign the bead has finished drying.
- Before packing: bead diameter consistency, hole centering, surface cracks and spots, and a scent comparison against the retained sample.
Inspection methods are collected on quality control. Time is the main cost in the process, which is why custom formulas run longer than catalogue lines; reference ranges are on MOQ and lead time, always confirmed in writing for each program.